Categories
Tags
-
#uk
#Small Business
#Sublimation Transfer Printing suppliers
#how to
#Ceramic Mugs
##Custom printing
#t-shirt printing
##Printing
#DOORMAT
#diy
#Custom T-Shirts
#sublimation
#UK sellers
##leather
#Heat Transfer Vinyls
##SmallBusiness
##PolymerProduction
#heat press
#Mugs and Cups
#vinyl
#Heat Transfer
#clam heat press
#EtsySeller
#sublimation blanks
#hustle
#Heat Press Machine
#Sublimation Printing
#Automatic
#How to remove HTV
#print tips
Archives
How to Remove Heat Transfer Vinyl from Clothing
-
Heat transfer vinyl, often called HTV, is one of the easiest and most satisfying ways to customise clothing. Whether you’re making personalised gifts, running a small print-on-demand shop, or just experimenting with DIY designs, HTV gives you that crisp, vibrant look that holds up well over time.
But let’s be honest—things don’t always go to plan. Maybe there’s a typo you didn’t notice until it was too late. Maybe the design has started peeling after repeated washes. Or maybe you’ve simply changed your mind and want a fresh look. Whatever the situation, knowing how to remove heat transfer vinyl properly can save both your garment and your sanity.
This guide walks you through practical, step-by-step methods that actually work, along with tips to avoid damaging your fabric in the process.
Why Removing HTV Is Tricky
Before jumping into removal techniques, it helps to understand what you’re dealing with.
HTV is designed to bond tightly to fabric using heat and pressure. Once applied correctly, the adhesive melts into the fibres and sets as it cools. That’s why it survives washing, stretching, and everyday wear.
The flip side is that removal isn’t as simple as peeling off a sticker. You need to reactivate or weaken that adhesive without harming the fabric underneath. That balance is where most people go wrong.
Can You Just Wash HTV Off?
Short answer: no.
HTV doesn’t dissolve in water or break down with regular detergent. Washing at high temperatures might eventually cause the edges to lift, but that’s not controlled removal—it’s more like slow damage.
If you want clean results without ruining the garment, you’ll need to use heat or a targeted solution.
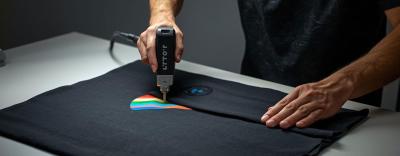
Method 1: The Iron and Peel Technique
This is the most reliable and beginner-friendly method.
What you’ll need
- A household iron
- Parchment paper or a thin cloth
- Tweezers or a weeding tool
- A flat, heat-resistant surface
Step-by-step
- Lay the garment flat and smooth out any wrinkles.
- Place parchment paper over the vinyl design.
- Heat the area with your iron at medium to high temperature for about 10 to 15 seconds.
- Remove the iron and quickly start lifting one corner of the vinyl using tweezers.
- Peel slowly while the vinyl is still warm. If it cools down, reapply heat and continue.
Pro tip
Work in small sections instead of trying to remove the whole design at once. This gives you more control and reduces the risk of tearing fabric fibres.
This method works best on cotton and polyester blends, which can handle moderate heat without damage.
Method 2: Using a Hair Dryer or Heat Gun
If you don’t have an iron nearby, a hair dryer can still get the job done.
How it works
The goal is the same—soften the adhesive so the vinyl loosens.
Steps
- Turn your hair dryer to the highest heat setting.
- Hold it a few inches away from the design.
- Move it constantly to avoid overheating one spot.
- Once the vinyl starts lifting, peel it gently with tweezers.
What to watch out for
Heat guns are more powerful but can scorch fabric quickly if you’re not careful. If you’re working with delicate materials like rayon or thin polyester, stick to a hair dryer for better control.
Method 3: Removing HTV with Adhesive Solvents
Sometimes heat alone isn’t enough, especially if the vinyl has been pressed very firmly or has aged over time.
That’s where chemical removers come in.
Common options
- Acetone-based solutions
- Rubbing alcohol
- Commercial vinyl removers
How to use them safely
- Turn the garment inside out.
- Apply a small amount of solvent to the back of the vinyl area.
- Let it sit for a few seconds to allow the adhesive to penetrate.
- Flip the garment back and start peeling the vinyl.
Important
Always test the solvent on a hidden area first. Some fabrics may fade, weaken, or react badly to chemicals.
This method is best reserved for stubborn designs or leftover adhesive that won’t budge with heat.
Dealing with Sticky Residue
Even after removing the vinyl, you might notice a sticky or slightly shiny patch left behind. That’s completely normal.
How to clean it up
- Reapply gentle heat and rub the area with a soft cloth
- Use a small amount of rubbing alcohol to dissolve leftover glue
- Wash the garment in mild detergent after cleaning
Avoid scrubbing aggressively. That can damage the fibres and leave the fabric looking worn out.
Fabric Matters More Than You Think
Not all fabrics respond the same way to heat or chemicals.
Safer fabrics
- Cotton
- Polyester blends
- Heavyweight fabrics
More delicate fabrics
- Rayon
- Silk
- Lightweight synthetics
For delicate materials, lower the heat and take your time. Rushing the process is the fastest way to leave marks or distort the fabric.
Common Mistakes to Avoid
Even with the right tools, a few small missteps can make things worse.
Peeling when it’s cold
Vinyl becomes brittle when cool and can tear unevenly, leaving more residue behind.
Using too much heat
High heat might seem faster, but it can scorch fabric or leave shiny press marks.
Skipping the test patch
Every fabric reacts differently. Always test your method on a hidden area first.
Pulling too hard
If the vinyl resists, stop and reheat. Forcing it off can stretch or damage the garment.
How to Prevent Removal Issues in the First Place
If you regularly work with HTV, prevention saves a lot of time.
Get your settings right
Incorrect temperature or pressure can cause poor adhesion or make later removal harder.
Use quality materials
Higher-quality vinyl tends to apply more evenly and remove more cleanly if needed.
Test before full application
A quick test on scrap fabric can reveal potential issues before you commit to the final design.
When It’s Better to Start Fresh
There are situations where removing HTV just isn’t worth the effort.
- The fabric is already worn or delicate
- The adhesive has fully bonded after long-term use
- The design covers a large area and would take too long to remove
In these cases, layering a new design over the old one or repurposing the garment might be a smarter move.
A Practical Approach That Actually Works
If you’re unsure where to start, here’s a simple strategy:
- Try heat first, using an iron or hair dryer
- Work slowly and peel while warm
- Clean up residue with gentle heat or alcohol
- Only use solvents if necessary
This approach keeps the process safe, controlled, and effective for most everyday situations.
Removing heat transfer vinyl isn’t always effortless, but it’s definitely manageable with the right technique. Take your time, stay patient, and focus on controlled heat rather than force. With a bit of practice, you’ll be able to fix mistakes, refresh designs, and extend the life of your garments without any drama.