Categories
Tags
-
#food
#fashion
#fitness
#Bollywood
# Google Play Store
#sarkari result
#‘CHINESE COFFEE’ PLAY REVIEW: A STRONG BREW MANASI RAWALGAONKARDECEMBER 31
#Cordoba Guitar
#Android App Development Company
#Android App Developer Company
#skincare tips
#fashion week
#Chest Workout
##movies
#healthy food
#Coffee
#Copper Gutter Repair New England
# human hair wigs
#guitar
#“Fair fashion
##skincare
##coffeepods
##hotcoffeepods
##coffeekcups
##how to make coffee
##best coffee
#“fashion
#facewash
#Bigg Boss Ott
#“fashionbeauty
# black heels
#AC hair cutter
##FashionDesigner
#The Boys Season 4 Set Images Reveal a Surprising Return
#Maruti Suzuki Eeco Cargo
##22ctgold
#Anti-Drone Market forecast
#skincare products
# #healthare
#Birthday Celebration
#android app developers for hire
# physical fitness trainers in Wollongong
##hair
#android app developers
#Athletic Leg Workouts
# fitness
#family vacation packages
#all-inclusive family vacation packages
##appdevelopmentCompany #fitnessappDevelopmentCompany
#Best Pre-Workout Supplemen
#birds
#ssc mts answer key sarkari exam
#ssc mts answer key sarkari result
#bigg boss today episode
#Maruti Super Carry
#"detailed life predictions free in hindi
#best zoom binoculars for bird watching
#silver
##BankeBihariTemple
##AncientTemples
#android app design services
#muscle mass
##Coffee #Coffeeshop #Australia
#temple
#best budget drones with 4k camera
#Best places to visit after marriage
##bankeybiharitemple
#Bigg Boss 18 Latest Episode
#Bigg Boss 18 Watch Live
#Bhutan Birding Tour: A Once-in-a-Lifetime Encounter with Avian Paradise
#Sauna Heaters
##GigoloServicesAmritsar
##HealthySkin
#kampala sauna and steam
#blackpink
##Ethical_Skincare_Solutions
##Natural_Skincare_Products
#beginnerfriendlyseniorworkouts
##DubaiNationalDrink #ArabicCoffee #Gahwa #CocktailDubai #BestCocktailBarsDubai #DubaiDrinks #EmiratiTraditions #DubaiNightlife #KarakTea #MintLemonade #SnoopyCircle #DubaiCulture #DubaiCocktails #UAEDrinks #TraditionalDubaiDrinks
#50 best places to visit in the world travel guide
#Bollywood movies
#custom sauna
#Fashion and Beauty Influencer
#maxi dresses for women
#10 Minute Ab Workout
#cardi b fashion
#cardbi fashion red carpet
#Weekend trips from Hyderabad
#best places to visit in Hyderaba
#Mallard Ducks
#birding
#birdwatch
##punjabbestskincareclinic
#Brave Browser
#Jhansi ki Rani
#Jhansi
#Exotic Travel Photography
#Travel Photography
#Exotic Travel Photography Tips
#Vallam Kali
#Onam as a Festival of Family
#Marie Callender Frozen
#Gaurav Khanna Bigg Boss 19
#Bigg Boss 19
#Taylor Swift and Travis Kelce
#Taylor Swift
#Travis Kelce Engaged
#Ariana Grande Get at Starbucks
#Sarkari Exam
#Akshardham Temple Delhi
#Victorious SUV Price in Delhi
#Hundru Falls from Ranchi
#Hundru Falls Distance
#Things to Do in Ganpatipule
#best places to Visit Ganpatipule
#Oilyskin
#iOS 18
#iOS 18 updates
#iOS 18 features
#TV Shows with Fatima Sana Shaikh
#Alia Bhatt Movies
#Alia Bhatt Movies in Bollywood
#Salman Khan
#Karwa Chauth Makeup Looks for 2025
#Karwa Chauth Makeup Looks
#Biig Boss 19
#Farhana Bhatt
#Shraddha Kapoor Movies
#Box Office Collection
#free Apple Music Code
#free Apple Music
##Tanya Mittal
#Bigg Boss 19 Wildcard Entry
#BB19
#Amaal Mallik
#Abhishek Bajaj Clash
#Birds Stay Warm In the Winter
#Bharti Singh Expecting Second Child
#JISOO
#Cost Of A Family Vacation
#Music It Makes Me Dance Lyrics
#Meher Bangles
#Meher Bangles Gold
#Taylor Swift Victoria's Secret Fashion Show
#Fashionable Older Italian Man
#Italian fashion Man
#Sauna Before or After a Workout
#Apple Music Free Trial
#The Boys Sauna
#Android 14 Battery Drain on Pixel 8
#Google Pixel 8
#Shop Cotton Clothes for Men
#Walmart Credit Card APR
#Meher Gardens
#PP Jewellers
#Palm Warbler Tail Bobbing Florida
#Fast Fashion Environmental
#APK and Sideload Quest 1
#PP Jewellers Gold Rate
#Gold Rate Today
#Dump a Hockey Star Full Movie
#Dump Movies
#Apple Air Pods 2nd Generation
#Wrens Migrate South
#Birds wrens migrate
#Intelligent Glamour Shift
#Wear a Sequin Skirt
#Sensory Friendly Movie Theater
Archives
How to Cancel the Apple Music Free Trial?
-
Posted by Emma Delay Filed in Technology #"detailed life predictions free in hindi #free Apple Music #Apple Music Free Trial 37 views
Apple Music is one of the most popular streaming platforms, offering access to millions of songs, curated playlists, and offline downloads. If you’ve signed up for a free trial but decided it’s not for you, it’s important to cancel it before the trial period ends—otherwise, you’ll be automatically charged for the next month’s subscription.
In this guide, you’ll learn how to cancel your Apple Music free trial on different devices — including iPhone, iPad, Mac, Windows, and Android.
Why You Might Want to Cancel the Apple Music Free Trial?
Before diving into the steps, here are a few common reasons people decide to cancel:
- You don’t use the service often enough.
- You prefer another music platform like Spotify or YouTube Music.
- You want to avoid being charged after the trial period ends.
- You signed up by mistake or just wanted to explore it.
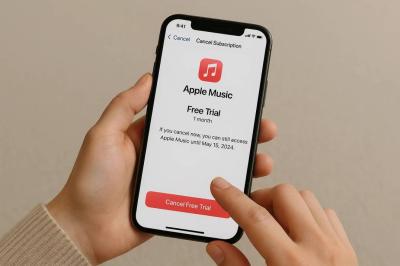
How to Cancel Apple Music Free Trial on iPhone or iPad?
- Open the Settings app on your device.
- Tap your name at the top.
- Go to Subscriptions.
- Find and select Apple Music.
- Tap Cancel Free Trial or Cancel Subscription.
Confirm your cancellation.
Tip: You’ll still be able to access Apple Music until your trial period expires, even after you cancel.
How to Cancel on a Mac?
- Open the App Store on your Mac.
- Click your profile icon (bottom left).
- Choose Account Settings.
Scroll down to Subscriptions and click Manage.
Find Apple Music and click Edit.
Click Cancel Subscription.
How to Cancel on a Windows PC?
If you use iTunes:
- Open iTunes on your computer.
- From the menu bar, select Account > View My Account.
- Sign in if prompted.
- Scroll to Settings and find Subscriptions.
- Click Manage next to it.
Select Apple Music and click Cancel Subscription.
How to Cancel on Android?
Open the Apple Music app on your Android device.
- Tap the three dots (⋮) or menu icon.
- Go to Account > Manage Subscription.
- Tap Cancel Free Trial or Cancel Subscription.
Confirm the cancellation.
Cancel Through the Web (Apple ID Account)
If you don’t have access to your devices:
- Visit music.apple.com
- Sign in with your Apple ID.
- Click your profile icon > Settings.
- Under Subscriptions, find Apple Music.
Click Manage, then select Cancel Subscription.
When Will the Free Trial End?
Apple Music trials usually last one month, though some promotions may offer up to six months. You can check your trial’s expiration date by:
Going to Settings > Subscriptions > Apple Music (on iPhone), or
Viewing your Account > Subscriptions on iTunes or the App Store.
You’ll have access to Apple Music until the end of the trial period, even if you cancel early.
What Happens After You Cancel?
You’ll lose access to Apple Music’s streaming library once your trial ends.
Your downloaded songs will no longer play offline.
Your playlists and preferences are saved for a limited time in case you reactivate your subscription later.
Final Thoughts
Canceling your Apple Music free trial is quick and easy, no matter which device you use. Doing it before your trial expires ensures you’re not charged unexpectedly. If you ever decide to come back, you can resubscribe anytime using your Apple ID.